Vue-Learn
入门
声明式渲染
你在编辑器中看到的是一个 Vue 单文件组件 (Single-File Component,缩写为 SFC)。SFC 是一种可复用的代码组织形式,它将从属于同一个组件的 HTML、CSS 和 JavaScript 封装在使用 .vue 后缀的文件中。
Vue 的核心功能是声明式渲染:通过扩展于标准 HTML 的模板语法,我们可以根据 JavaScript 的状态来描述 HTML 应该是什么样子的。当状态改变时,HTML 会自动更新。
<script setup>
import { ref } from 'vue'

// 组件逻辑
const message = "Hello World!"
// 此处声明一些响应式状态
const counter = ref({
  count: 37
})
</script>

<template>
  <h1>{{message}}</h1>
  <p>{{counter.count}}</p>
</template>
|
Attribute 绑定
两种语法
<div v-bind:id="dynamicId"></div>
<div :id="dynamicId"></div>
<script setup>
import { ref } from 'vue'

const titleClass = ref('title')
const textClass = ref('text')
</script>

<template>
  <h1 v-bind:class="titleClass">Make title red</h1> <!-- 此处添加一个动态 class 绑定 -->
  <h1 :class="textClass">Make text purple</h1>
</template>

<style>
    .title {
        color: red;
    }
    .text {
        color: purple;
    }
</style>
|
事件监听
采用v-on指令,或者简写@
<button v-on:click="increment">{{ count }}</button>
<button @click="increment">{{ count }}</button>
|
<script setup>
import { ref } from 'vue'

const count = ref(0)
function increment() {
  count.value += 3
}
</script>

<template>
  <!-- 使此按钮生效 -->
  <button @click="increment">count is: {{ count }}</button>
</template>
|
表单绑定
可使用 v-bind 和 v-on 来在表单的输入元素上创建双向绑定
<script setup>
import { ref } from 'vue'

const text = ref('')

function onInput(e) {
  text.value = e.target.value
}
</script>

<template>
  <input :value="text" @input="onInput" placeholder="Type here">
  <p>{{ text }}</p>
</template>
|
也可使用v-model指令,就是上述操作的一个语法糖
v-model 会将被绑定的值与 <input> 的值自动同步,这样我们就不必再使用事件处理函数了。
<script setup>
import { ref } from 'vue'

const text = ref('')
</script>

<template>
  <input v-model="text" placeholder="Type here">
  <p>{{ text }}</p>
</template>
|
条件渲染
就是if-else语句,根据条件渲染不同的界面
<script setup>
import { ref } from 'vue'

const awesome = ref(true)

function toggle() {
  awesome.value = !awesome.value
}
</script>

<template>
  <button @click="toggle">toggle</button>
  <h1 v-if="awesome">Vue is awesome!</h1>
  <h1 v-else>Oh no 😢</h1>
</template>
|
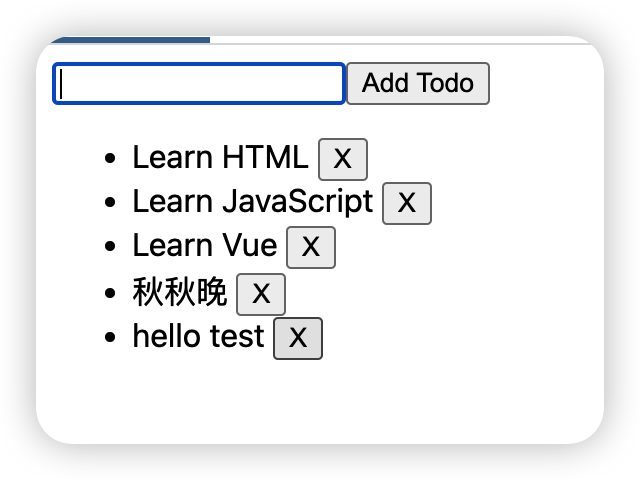
列表渲染
<script setup>
import { ref } from 'vue'

// 给每个 todo 对象一个唯一的 id
let id = 0

const newTodo = ref('')
const todos = ref([
  { id: id++, text: 'Learn HTML' },
  { id: id++, text: 'Learn JavaScript' },
  { id: id++, text: 'Learn Vue' }
])

function addTodo() {
  todos.value.push({
    id: id++,
    text: newTodo.value
  })
  newTodo.value = ''
}

function removeTodo(todo) {
  todos.value = todos.value.filter(
    (item) => item !== todo
  )
}
</script>

<template>
  <form @submit.prevent="addTodo">
    <input v-model="newTodo">
    <button>Add Todo</button>
  </form>
  <ul>
    <li v-for="todo in todos" :key="todo.id">
      {{ todo.text }}
      <button @click="removeTodo(todo)">X</button>
    </li>
  </ul>
</template>
|
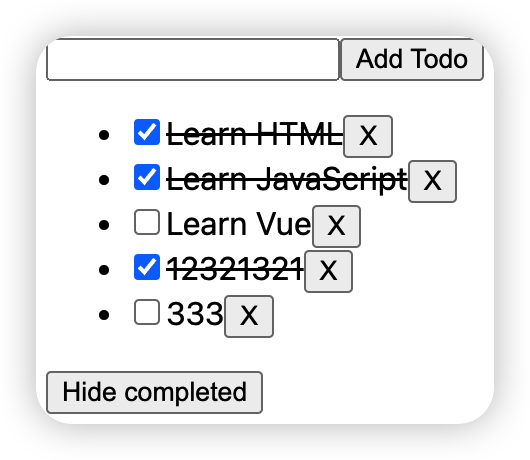
计算属性
computed()。它可以让我们创建一个计算属性 ref,这个 ref 会动态地根据其他响应式数据源来计算其 .value
<script setup>
import { ref, computed } from 'vue'

let id = 0

const newTodo = ref('')
const hideCompleted = ref(false)
const todos = ref([
  { id: id++, text: 'Learn HTML', done: true },
  { id: id++, text: 'Learn JavaScript', done: true },
  { id: id++, text: 'Learn Vue', done: false }
])

const filteredTodos = computed(() => {
  return hideCompleted.value ? todos.value.filter((t) => ! t.done) : todos.value
})

function addTodo() {
  todos.value.push({ id: id++, text: newTodo.value, done: false })
  newTodo.value = ''
}

function removeTodo(todo) {
  todos.value = todos.value.filter((t) => t !== todo)
}
</script>

<template>
  <form @submit.prevent="addTodo">
    <input v-model="newTodo">
    <button>Add Todo</button>
  </form>
  <ul>
    <li v-for="todo in filteredTodos" :key="todo.id">
      <input type="checkbox" v-model="todo.done">
      <span :class="{ done: todo.done }">{{ todo.text }}</span>
      <button @click="removeTodo(todo)">X</button>
    </li>
  </ul>
  <button @click="hideCompleted = !hideCompleted">
    {{ hideCompleted ? 'Show all' : 'Hide completed' }}
  </button>
</template>

<style>
.done {
  text-decoration: line-through;
}
</style>
|

生命周期和模板引用
ref 用于注册元素或子组件的引用。
使用 onMounted() 函数,允许我们注册一个在组件的特定生命周期调用的回调函数
<script setup>
import { ref, onMounted } from 'vue'

const p = ref(null)
onMounted(() => {
  p.value.textContent = "hello qqw"
})
</script>

<template>
  <p ref="p">hello</p>
</template>
|
侦听器
https://cn.vuejs.org/guide/essentials/watchers.html
<script setup>
import { ref, watch } from 'vue'

const todoId = ref(1)
const todoData = ref(null)

async function fetchData() {
  todoData.value = null
  const res = await fetch(
    `https://jsonplaceholder.typicode.com/todos/${todoId.value}`
  )
  todoData.value = await res.json()
}

fetchData()

watch(todoId, fetchData)
</script>

<template>
  <p>Todo id: {{ todoId }}</p>
  <button @click="todoId++">Fetch next todo</button>
  <p v-if="!todoData">Loading...</p>
  <pre v-else>{{ todoData }}</pre>
</template>
|
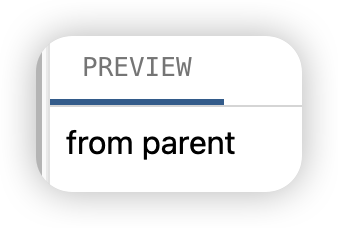
Props
子组件可以通过 props 从父组件接受动态数据。首先,需要声明它所接受的 props:
<script setup>
const props = defineProps({
  msg: String
})
</script>
|
父组件可以像声明 HTML attributes 一样传递 props。若要传递动态值,也可以使用 v-bind 语法:
<script setup>
import { ref } from 'vue'
import ChildComp from './ChildComp.vue'

const greeting = ref('Hello from parent')
</script>

<template>
  <ChildComp :msg="greeting" />
</template>
|
Emits
子组件还可以向父组件触发事件:
<script setup>
// 声明触发的事件
const emit = defineEmits(['response'])

// 带参数触发
emit('response', 'hello from child')
</script>
|
emit() 的第一个参数是事件的名称。其他所有参数都将传递给事件监听器。
父组件可以使用 v-on 监听子组件触发的事件——这里的处理函数接收了子组件触发事件时的额外参数并将它赋值给了本地状态:
<script setup>
import { ref } from 'vue'
import ChildComp from './ChildComp.vue'

const childMsg = ref('No child msg yet')
</script>

<template>
  <ChildComp @response="(msg) => childMsg = msg"/>
  <p>{{ childMsg }}</p>
</template>
|
插槽
父组件还可以通过插槽 (slots) 将模板片段传递给子组件:
<script setup>
import { ref } from 'vue'
import ChildComp from './ChildComp.vue'

const msg = ref('from parent')
</script>

<template>
  <ChildComp>{{msg}}</ChildComp>
</template>
|
在子组件中,可以使用 <slot> 元素作为插槽出口 (slot outlet) 渲染父组件中的插槽内容 (slot content):
<template>
  <slot>默认内容,会在父组件没有传递插槽内容时显示</slot>
</template>
|
Todo…